The Connect Data Links will allow users to be able to link two items they see together, giving an easy way to denote a relationship, allow for ease of navigation between two items and provide additional context on an item. The initial items that support this functionality are Audits/Assessments, Documents, Products, Locations, and Incidents.
There are various use cases as to why you would want to use Connect Data Links, for example:
- You may want to link a Certificate of Analysis document that relates to an inspection audit since that document needs to be referenced frequently to address several questions asked within the audit.
- You may want to link audits together done on different batches of products.
- You may want to create a parent/child relationship between Audits or Documents.
- Ability to link multiple case sizes of the same product. For example 4/6/12 packs of beer or 12 packs of snack-size chips vs individual snack-size chips. Different count sizes of supplements.
- Ability to link new versions of products with allergen changes.
- Ability to determine what locations are approved to source or manufacture a specific product.
- Ability to see what audit triggered an incident.
Link permissions are based on the underlying permissions for the items that are being linked; if you can view an item you can view its links, while if you can edit an item you will be able to edit its links.
Both suppliers and community owners can create links; however, links are not shared between businesses and are therefore only visible to the business that created the link.
Steps to linking items on an audit or assessment
1. To link an item, click on the category that you wish to link an item within the left navigation. Then select the item within the list view that you want to add a link to.
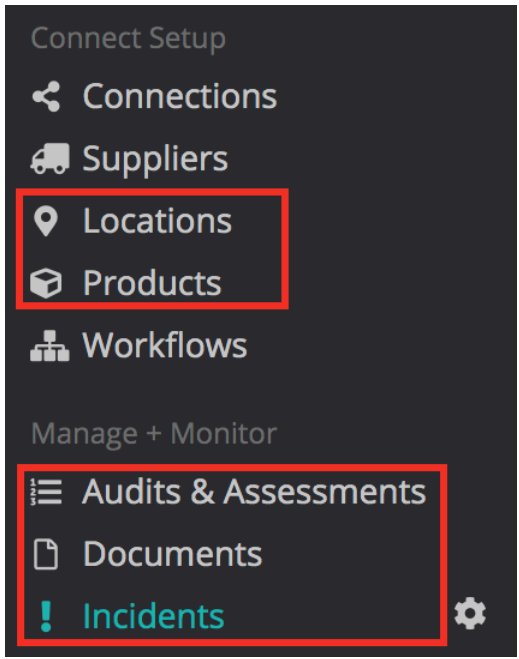
2. After you have selected an item within the list view, you will be on the details page of that item, here you will see a links section within the right-hand side of the details for documents, products, locations, and incidents, and for audits, you will see the links section on the lefthand side of the details page.

3. To add a link, click on the Add/Edit icon in green.

4. You will see a drop-down list of categories that you can link to.
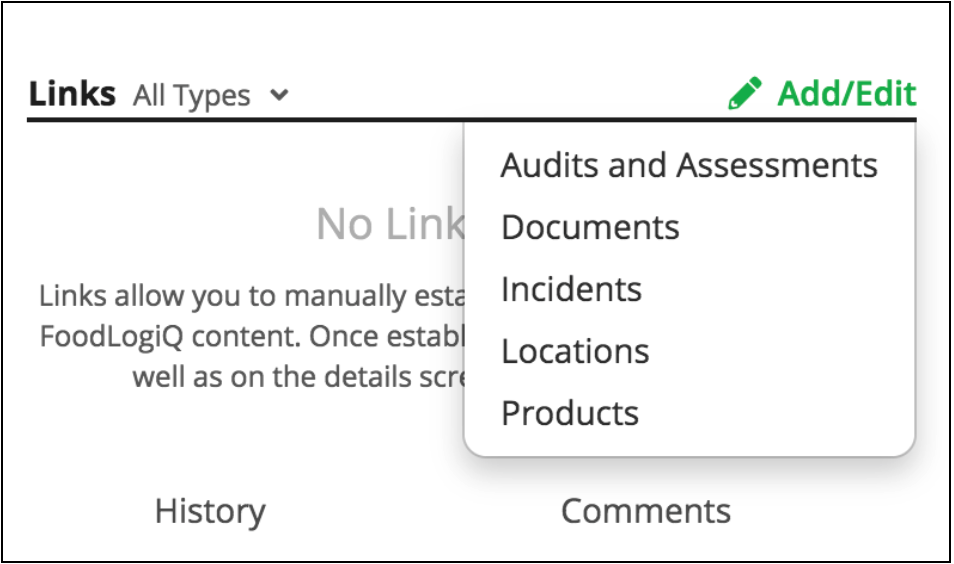
5. Once you select the category (Audits and Assessments, Documents, Incidents, Locations, or Products) you want to link to, a window will appear allowing you to choose which item within that category you want to link to.
6. If a user has selected the:
-
-
- Audits and Assessments category: Users will be able to select from Supplier Audits and Assessments and Internal Audits. By default, users will land on the Supplier Audits and Assessments tab within the modal.
- Documents, Products, or Locations categories: Users will be able to select from My and Shared items. By default, users will land on My items.
-
Please note: For document categories, users will only see non-archived documents within the list view.
-
-
- Incidents category: Users will be able to select from My Incidents.
-
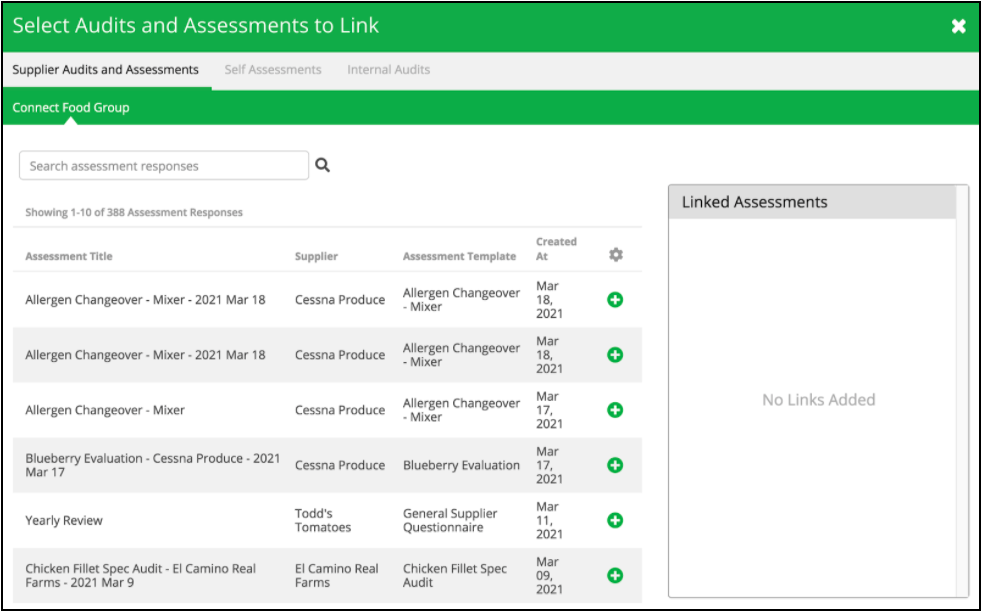
7. Users will be able to search for a specific item within the search box if they are unable to find it quickly from the list view.

- Alternatively, users will be able to configure additional columns by selecting the gear icon.

9. To link a specific item, click on the green plus icon next to the item you want to link.

10. After clicking the plus icon, that item will appear under Linked Assessments on the right-hand side.
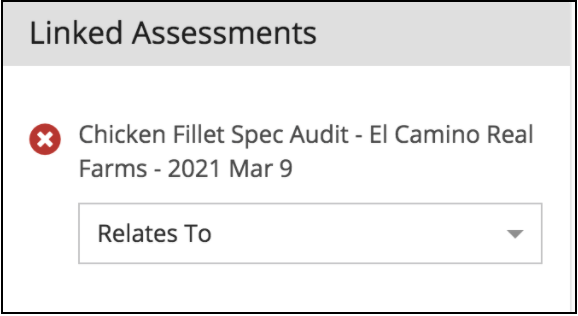
11. Once items that you want to link are added to the Link section, you will be able to choose the relationship of this item you want to link. The relationship options simply describe the relationship between two items.

12. Users will be able to add multiple links within this category for an object by clicking on the plus icon next to the item they want to link.
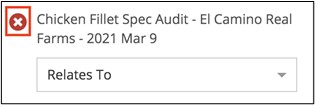
13. To remove the link, click on the red X icon.
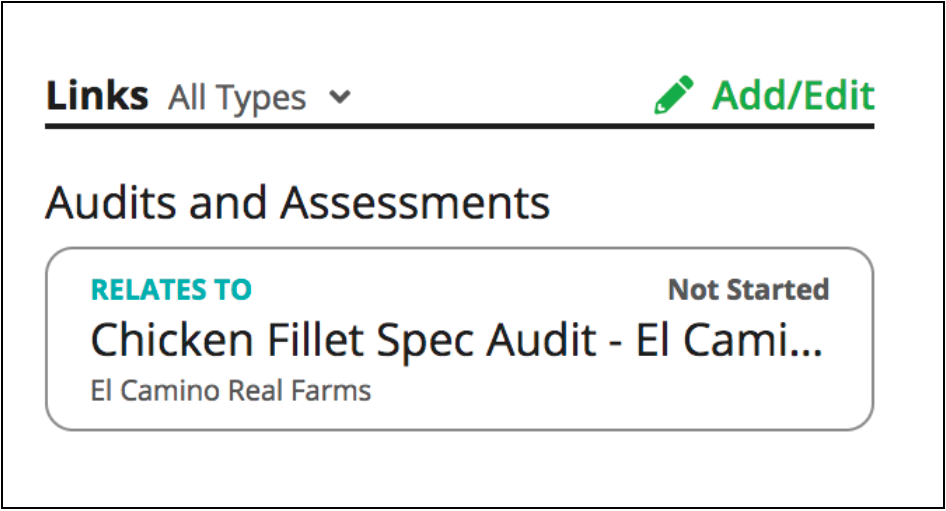
14. Once you click save, links will appear on the Links section of your details page.
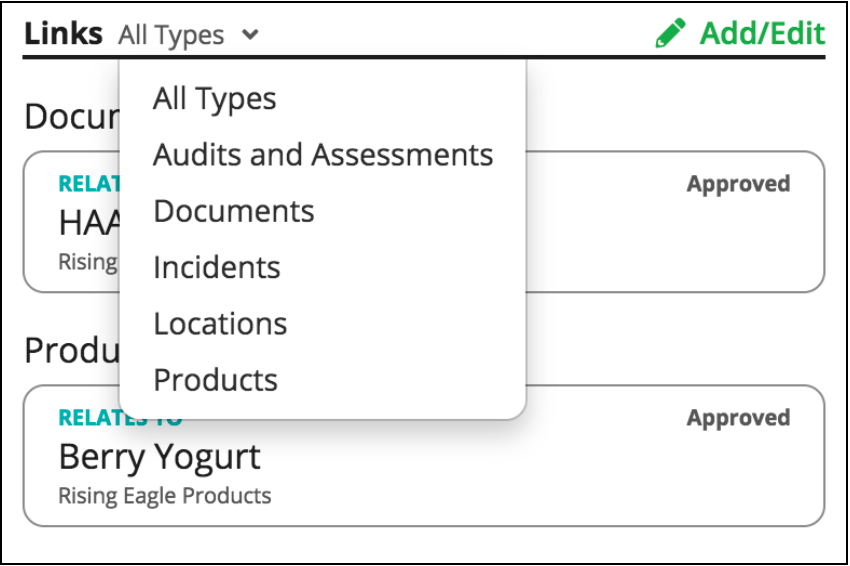
15. Users can optionally filter to specific types of links by selecting the All Types drop-down option.
16. To add or edit additional links, repeat step 3.
17. Once an item has been linked you can click on the linked card, which will redirect you to the actual linked item.
Please note: If a linked item is removed by the community owner or the supplier, the link will be removed from the details page.