Introduction to FoodLogiQ User Roles and Permissions
FoodLogiQ uses role-based permissions to customize user access within the FoodLogiQ Connect platform. A user can be assigned one or more roles, with each role designating multiple permissions. A user with multiple roles will be granted the union of all the permissions those roles are assigned. For example, if User A is assigned Role 1 and Role 2, then User A will have access to all the permissions defined in Role 1 as well as all the permissions defined in Role 2.
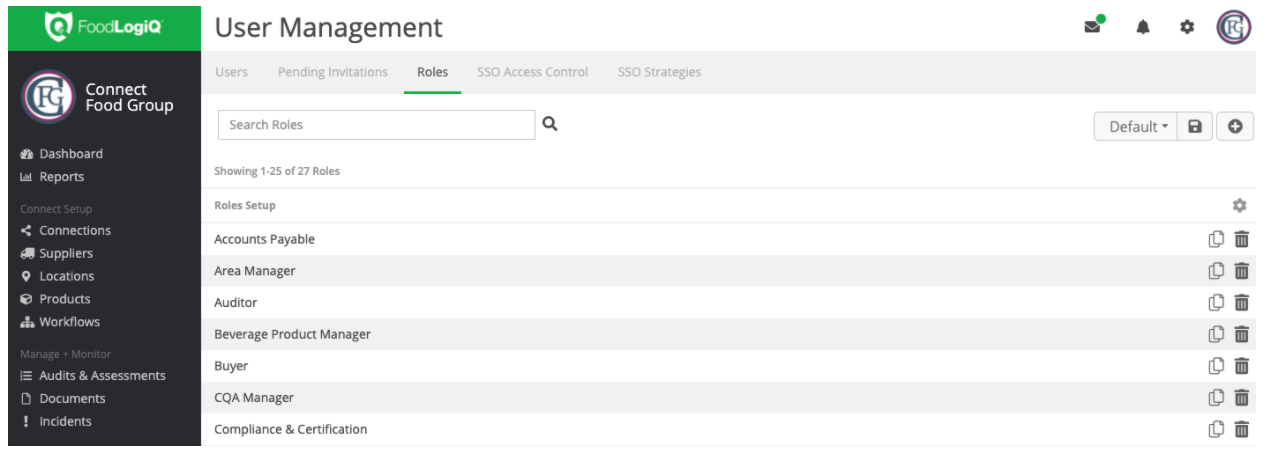
Roles can be created and managed from within FoodLogiQ Connect by clicking the gear symbol in the top right corner, selecting "User Management" from the menu, and navigating to the "Roles" tab. Please refer to the Creating Custom User Roles knowledge base article for more information.
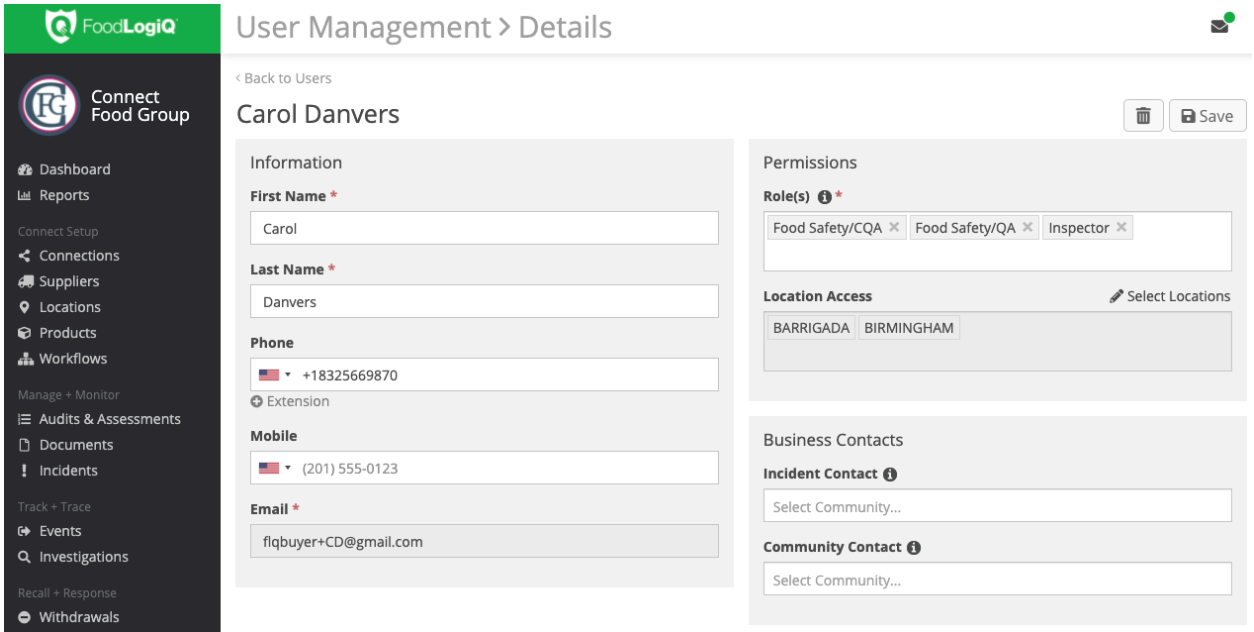
Additionally, each user may be assigned access to specific locations they work with or manage; users with location restrictions will only see information about that location when working with incidents, internal audits, or other modules within the platform. Location permissions are defined on each user’s record and can be accessed by clicking the gear symbol in the top right corner, selecting “User Management” from the menu, and clicking on a specific user. Please refer to the Location Permissions knowledge base article for more information.
Overview of SSO Authentication and Authorization
Enterprise customers with an SSO License can configure FoodLogiQ Connect to support both SSO Authentication and SSO Authorization. SSO Authentication refers to the process in which a user provides their login credentials, gets redirected to an enterprise’s own identity management provider to log in, and if the login is approved they are redirected to the FoodLogiQ platform. SSO Authentication eliminates the need to maintain FoodLogiQ-specific user names and passwords.
SSO Authorization goes one step further and dynamically assigns a user’s roles based on the roles defined in the customer’s own identity management system. This dynamic mapping removes the need to manually invite users within FoodLogiQ and ensures that enterprise user access within FoodLogiQ can be maintained from a single source of truth in the identity management system.
Within the FoodLogiQ platform, enterprises may choose to use SSO Authentication only, or both SSO Authentication and Authorization. Please contact FoodLogiQ Support at support@foodlogiq.com to enable SSO capabilities.
Prerequisites for SSO Authorization
There are several prerequisites to enabling SSO Authorization for your enterprise business:
- SSO Authentication enabled for the business.
- If authorization will grant access to FoodLogiQ Roles, then those roles must be created
- If authorization will limit access to specific locations, then those specific My Locations must be present within the business
-
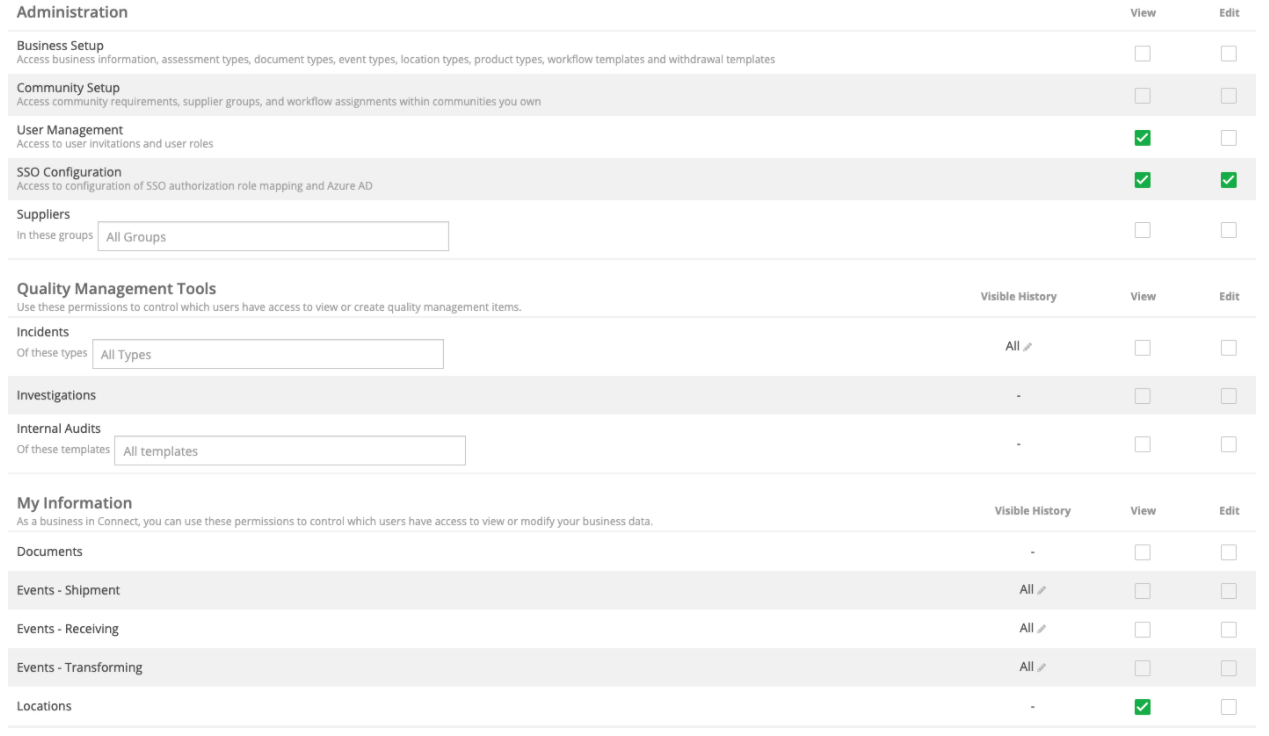
The user managing the SSO Access Controls must either have the built-in Administrator role or a role with at minimum (per the image below)
- User Management view permission
- SSO Configuration write permission
- My Locations view permission
SSO Access Controls
After prerequisites are met, a user can access the SSO Access Control section of FoodLogiQ administration by clicking the gear symbol in the top right corner, selecting “User Management” from the menu, and then navigating to the SSO Access Control tab.
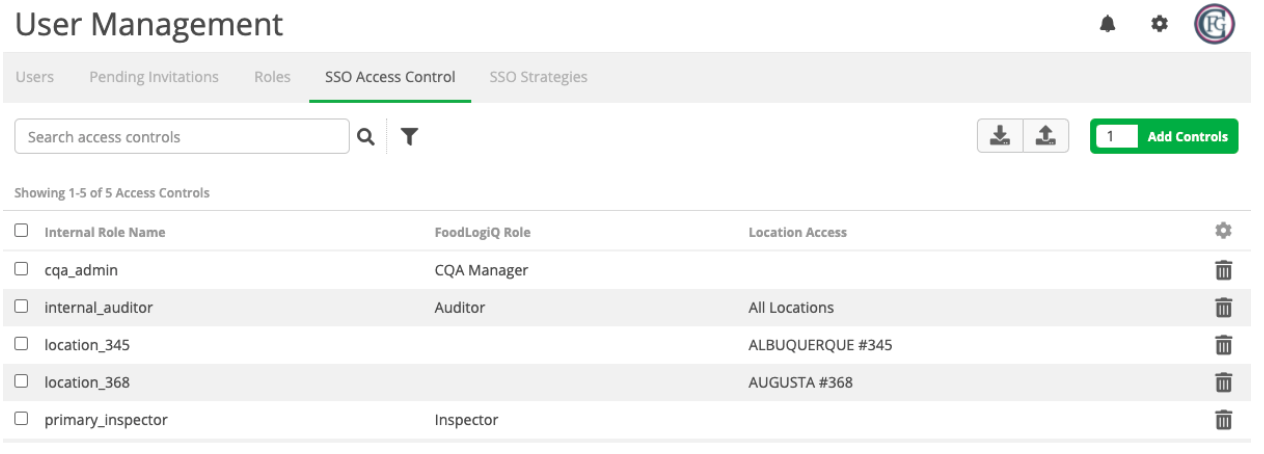
From this tab, an administrator can configure SSO Access Controls for their business. Each access control defines what roles or location access should be granted to a user based on the defined role from their identity provider.
Examples
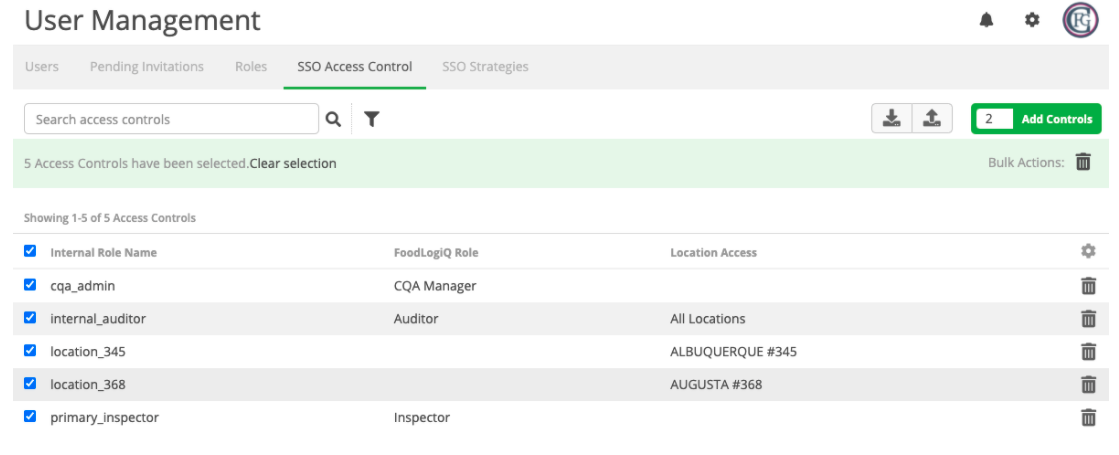
In the first example, when a user logs in and has the cqa_admin role from their identity provider, they will be granted the CQA Manager role (and all of its permissions) in FoodLogiQ. Location access is not affected/granted.

In the example below, when a user logs in and has the internal_auditor role from their identity provider, they will be granted access to the Auditor FoodLogiQ role and access to all locations.

In the final example below, when a user logs in and has the location_345 role from their identity provider, their location access will be restricted to the Albuquerque #345 location.

It is important to note that FoodLogiQ roles are additive and the user will be granted the union of the most permissions available based on their roles. For instance, given the examples above a user with both the cqa_admin and internal_auditor roles would be granted both CQA Manager and Auditor FoodLogiQ roles; while a user with both internal_auditor and location_345 roles would be granted access to the Auditor FoodLogiQ role and all locations (as the mapping from internal_auditor grants access to all locations, which takes precedence over the location restriction from the access control for location_345).
The design of the SSO Access Controls allows for a broad range of potential configurations to meet enterprise needs in defining identity control and user access.
Working With a Single SSO Access Control
Click the green button in the top right corner to Add Controls to add a single SSO Access Control. If you would like to add several controls at once, you can adjust the number of fields that will be available by changing the number from 1 to up to 9 at a time; however, if you’re working with greater than 9 controls it is recommended that you use the CSV upload functionality explained below.
After clicking the button, you will see a new form window with a line for each access control you’d like to add. There are four columns on this form:
- Internal Role Name - The role name from the enterprise’s identity provider. Most often comes in the form of a CN (Common Name) listing. Each role name should have an unique access control.
- FoodLogiQ Role - One or more FoodLogiQ roles that users will be granted when they log in with the Internal Role Name.
- Location Access - One or more locations that the user will be restricted to when they log in with the Internal Role Name.
- All Locations - A checkbox to denote whether users with the Internal Role Name should have access to all locations or not.
Each access control must have at least one permission associated with it.
Upon clicking save, the access control is persisted in the platform. Users can update individual access controls by clicking the row or delete an access control by clicking the trash icon on the right.
Working With Multiple SSO Access Controls
Depending upon an enterprise’s size, there may be a need for hundreds or thousands of individual access controls. This is to be expected, for instance, where a business may have a specific internal role for each location and would like to limit access accordingly to each physical location. In this scenario, it is recommended to use the bulk CSV export and import controls to manage multiple access controls.
Getting a CSV Template for Adding or Updating Controls
The export button in the top right of the screen will download the current list of all access controls to CSV format. The format of the CSV generally follows what can be seen in the user interface, with a notable addition - the first column is the unique identifier for existing access controls and allows users to bulk update existing controls.

If no access controls are currently available, the download will serve as a blank template with just the column headers.
To add new access controls, fill out the columns for Internal Role Name, FoodLogiQ Role, Location Access, and All Locations (TRUE/FALSE). The Access Control ID column may be left blank. Note that if you are adding multiple values to either the FoodLogiQ Role or Location Access columns, the value must be comma-separated and quoted to appear as a single cell.
To update existing controls, each existing row can have its values updated. Be careful not to edit the existing Access Control ID, as that serves as the unique key for the setting to update.
Both adds and updates can be made in a single file.
Updating Multiple Controls Through CSV Upload
When the CSV file is ready, users can use the Upload icon to upload the CSV file to the system. Clicking the button will bring up a form with a window to load the CSV file, and clicking Import File will update the Access Controls based on the CSV file.
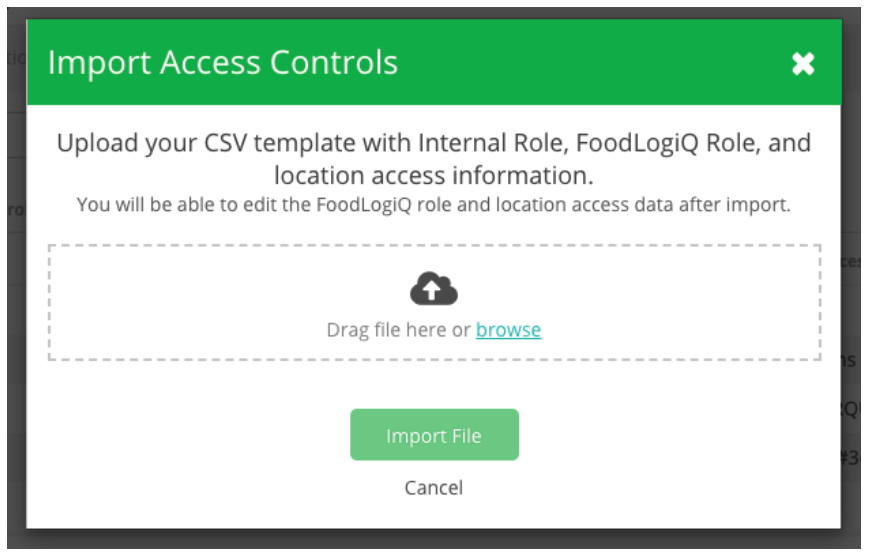
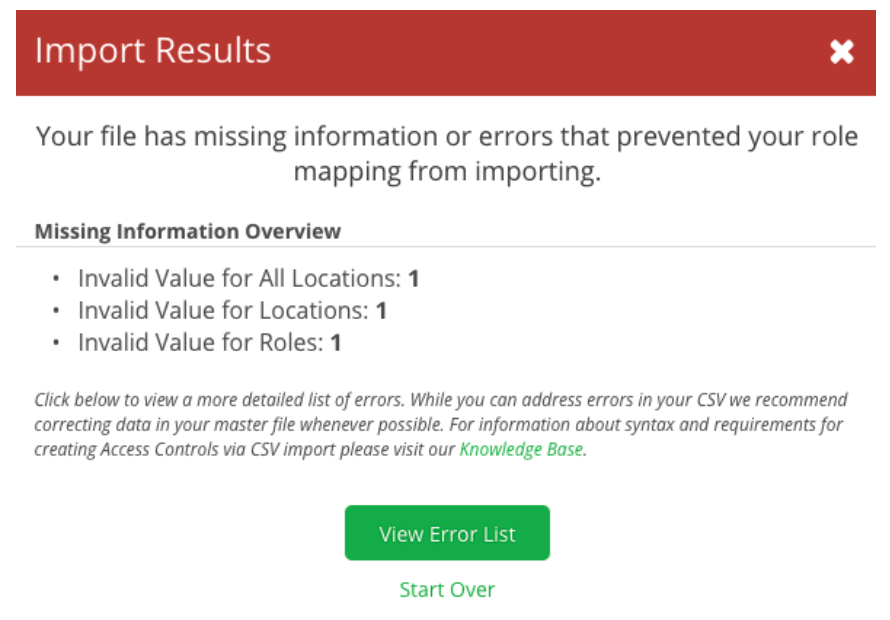
If there are any errors in the file, the entire upload will fail, and users will be guided to the specific lines and errors that caused a problem. After correcting the file, the import can be attempted again.
Bulk Deleting Multiple Controls
SSO Access Controls may also be deleted in bulk. To enable a bulk delete from a list of controls (either filtered or all available), either select individual controls you’d like to delete or you can select all currently visible controls by selecting the checkbox in the top left of the table. There is a bulk delete action available in the green shaded bar on the right of the screen.
Enabling SSO Authorization
When all desired access controls are in place, contact support@foodlogiq.com to enable SSO Authorization for your account. Once SSO Authorization is enabled, any user that authenticates through the enterprise identity provider will have their roles dynamically configured by the access controls listed on the SSO Access Control page. This will overwrite currently configured roles, which is a key feature of SSO Authorization as role access will be defined every time a user logs into the platform.