When inviting users to help manage your business in FoodLogiQ Connect, you have the ability to restrict their location access. You can define a user's access upon invite or edit as needed from the User Management page. By default every user has access to all locations. However, you may want to limit a user's access for different reasons.
Why would you want to restrict location access?
- As a restaurant chain operator, you may have users that work at a single location. You can restrict their access so they don't need to select their location when submitting a quality incident and can only view incidents relevant to them.
- If you have regional managers or area directors who are responsible for a subset of restaurants, you can select the locations that are relevant for that user. This restricts the information that the user can view within Connect.
Steps to Set a New User's Location Access
- Click on the settings cog wheel
 at the top right corner and then select User Management
 - Click the
 button to open the invite form. Complete the required fields.
 - Select the appropriate locations within the Location Access dropdown. You can also search to restrict the list displayed.
- Click the Invite button once complete.
Steps to Edit an Active User's Location Access
- Click on the settings cog wheel
 in the top right corner and then select User Management
 - Click "All Locations" next to the user you wish to adjust access for.
- Click the
 button next to each location that you want them to have access to. You can also use the search box to restrict your results.
 - Once complete, click
 .
.
Details on Setting a User's Location Access
When inviting a new user, simply select the location names within the "Location Access" dropdown menu. They will appear once selected. Click Invite when complete.
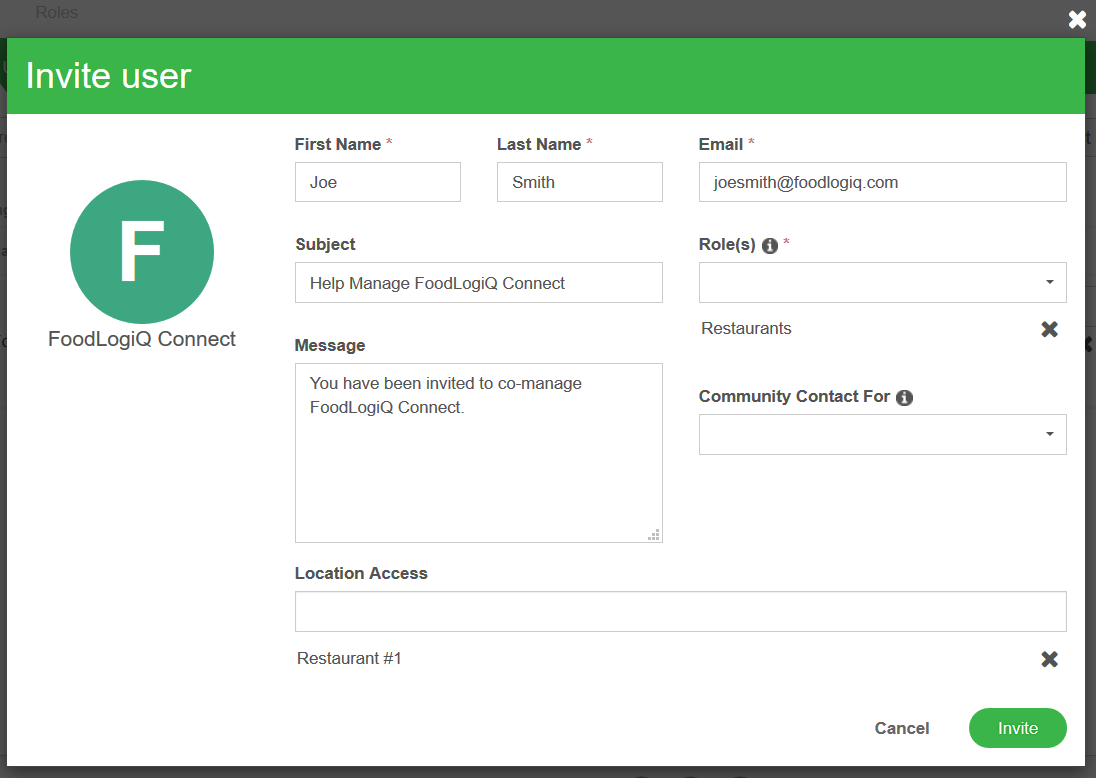
For existing users, you can view their location access within the Locations column on the User Management page. By default users have access to All Locations unless you restrict.

You can also apply filters on the User Management page based on Location Access to easily view users that have access to specific locations.
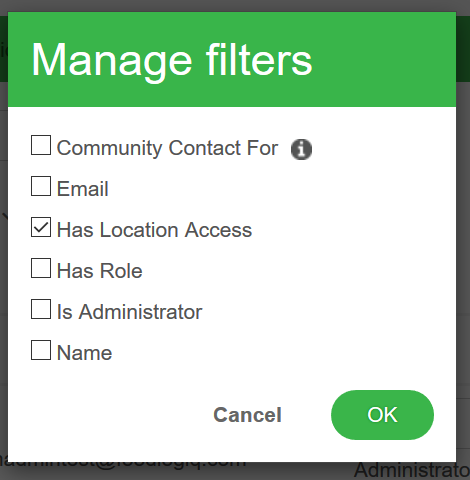
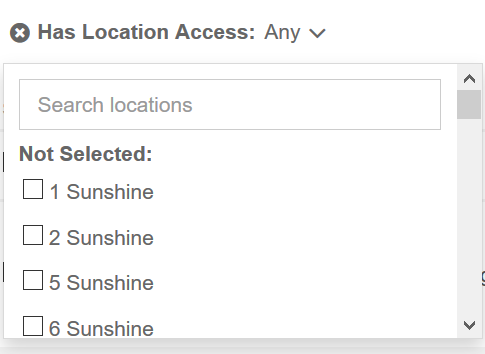
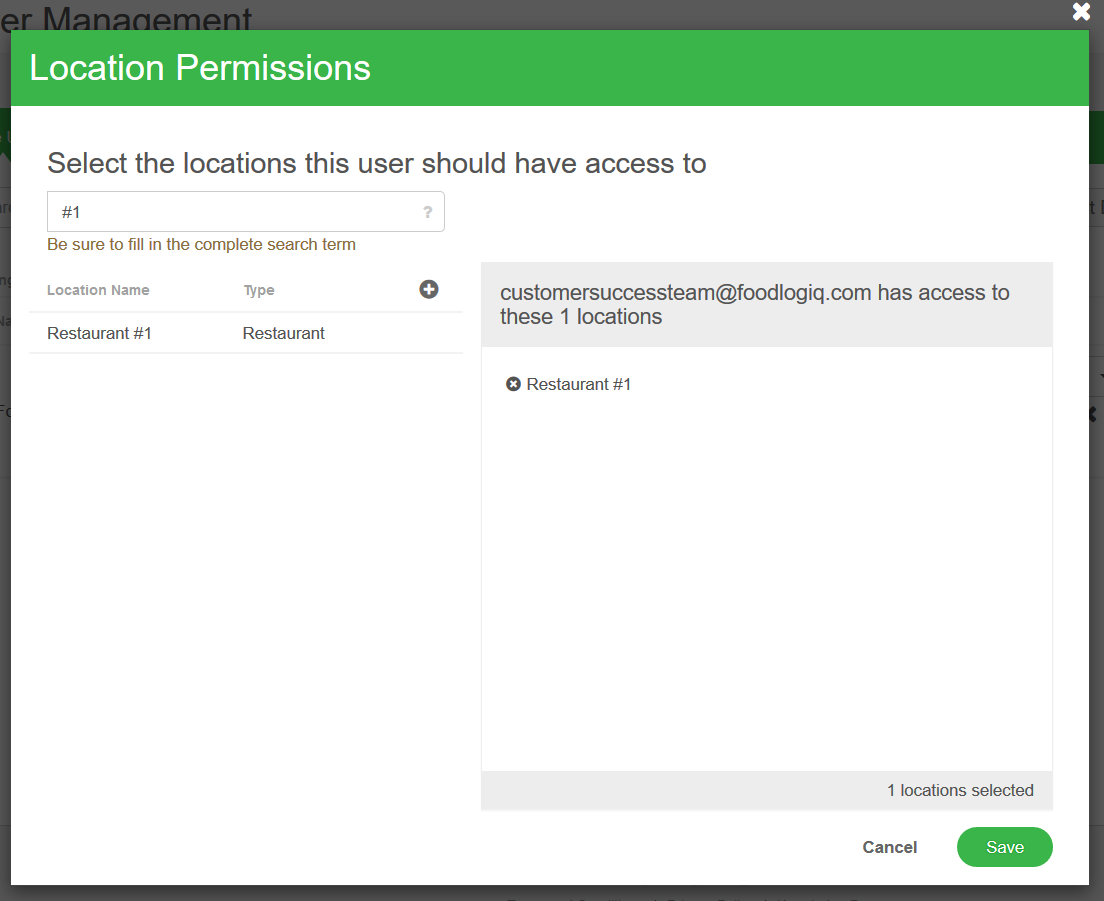
To edit a user's location access, simply click "All Locations" or the "# Locations" link within the Location column on the User Management page. You will see a window appear like the one below.
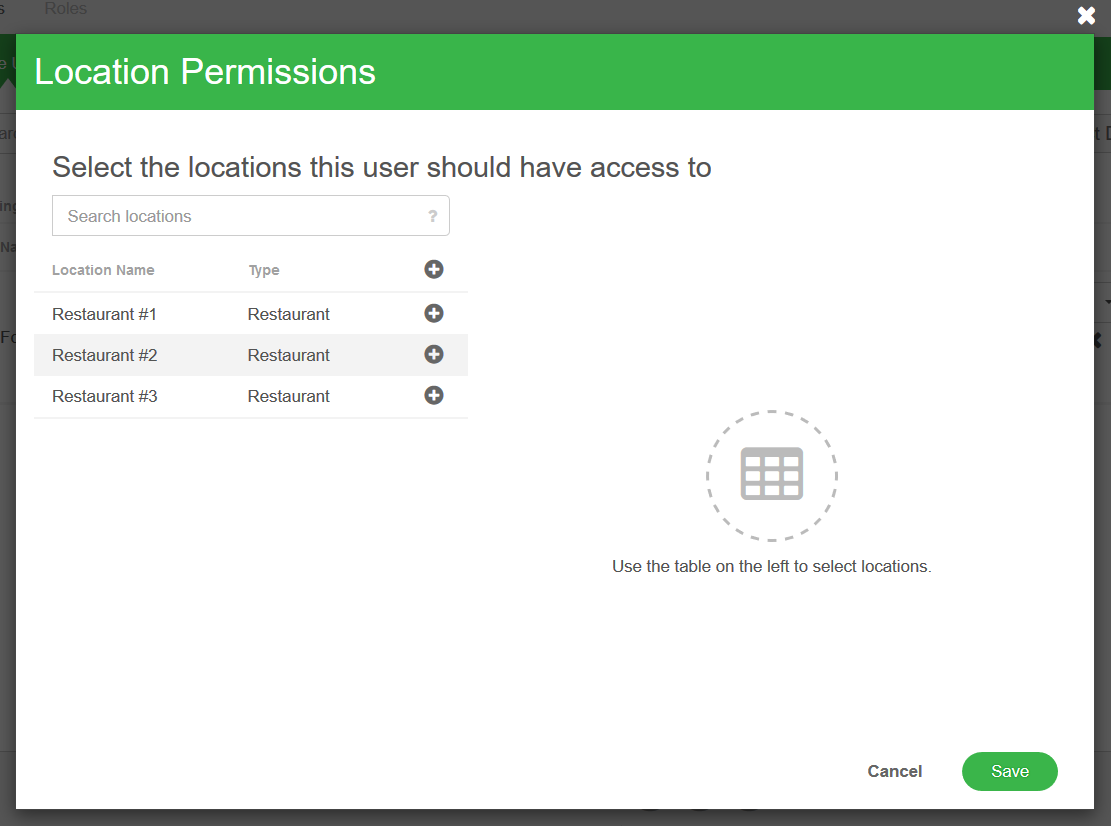
Select the ![]() button next to each desired location. You will see them appear on the list on the right. When complete, click Save.
button next to each desired location. You will see them appear on the list on the right. When complete, click Save.
The number of locations they have access to will then appear in the User Management page. See example below:
