When adding a new contact, Community Owners and Community Members have the ability to set up a new user as one or more contacts for a location.
For information on adding a new user, please see the User Management article.
Steps for Setting a New User Up as a Location Contact
- Click on the
 button.
 - Select the appropriate contact (Note: you can select multiple contacts if they all apply to the user)
- Click Next.
- Select the Location for where they are to be the contact for.
- Click on Next.
- The last screen will show you what the user will be set up as. To confirm it is correct, click Done.
Details on Setting a New User Up as a Location Contact
- Click on the button.
- Select the appropriate contact (Note: you can select multiple contacts if they all apply to the user)
- Click Next.
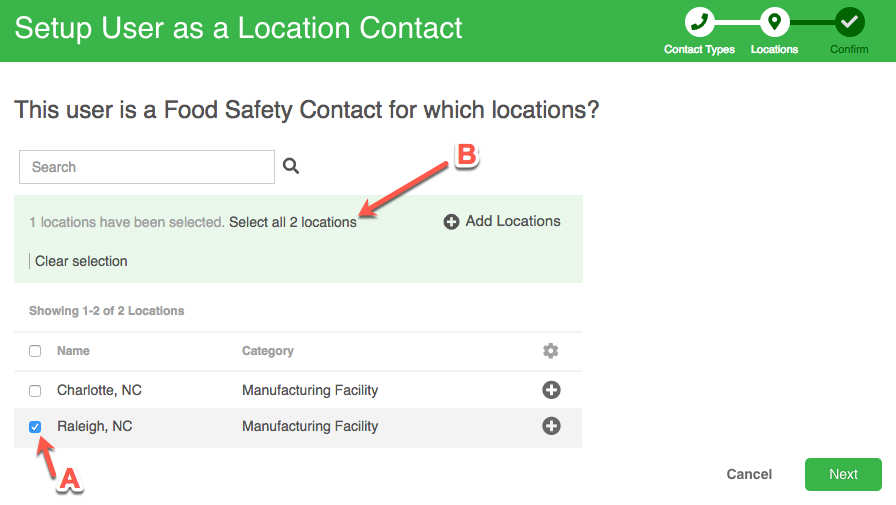
- Select the Location for which they are to be the contact for.
- If they are the contact for just 1 location, click the
 button next to that location.
 - If they are the contact for all locations, click on a box next to any location (A), then click on the Select all __ locations link (B).