As a Community Owner, communication with your suppliers is crucial to your business. There are multiple ways to communicate with your suppliers’ contacts in FoodLogiQ.
Messages (within FoodLogiQ)
NOTE: In order to send a message to a Supplier, you must first have a Community Contact set up for the community. For more information on Community Contacts, click here.
Email (outside of FoodLogiQ)
Messaging in FoodLogiQ
Messaging suppliers in FoodLogiQ can be done individually or in bulk.
To send a message to one supplier, there are two options.
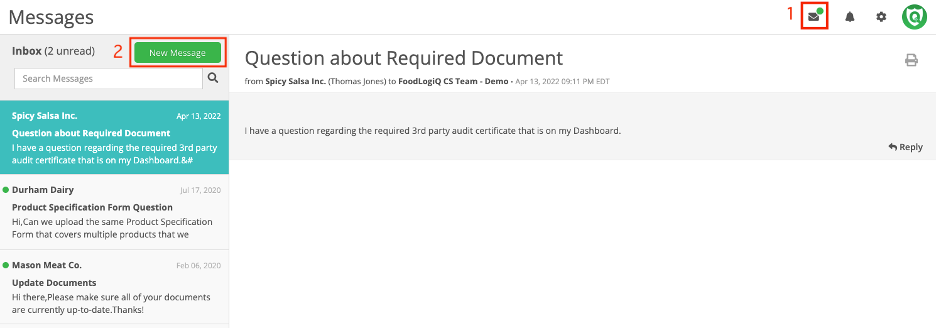
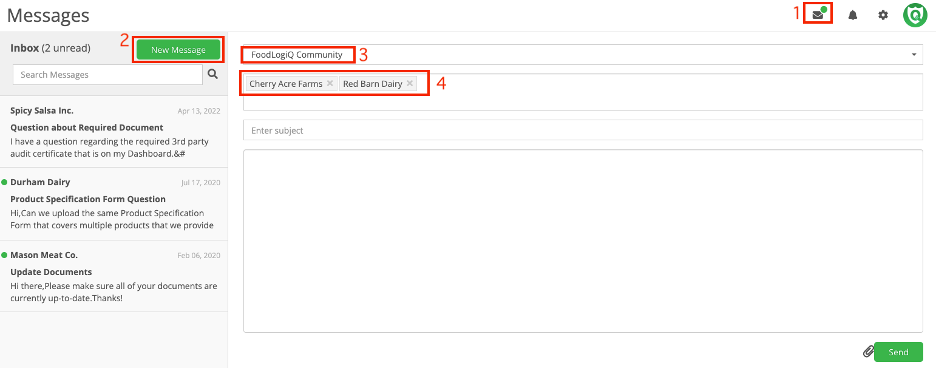
Option 1: Click on the envelope icon in the top right corner. In order for the envelope to be present, the user must be a Community Contact for the community. Then click New Message and select the Community in which the supplier belongs. Then begin typing the supplier’s name in the TO: field. Once messages are sent to and from suppliers, they will be found here.
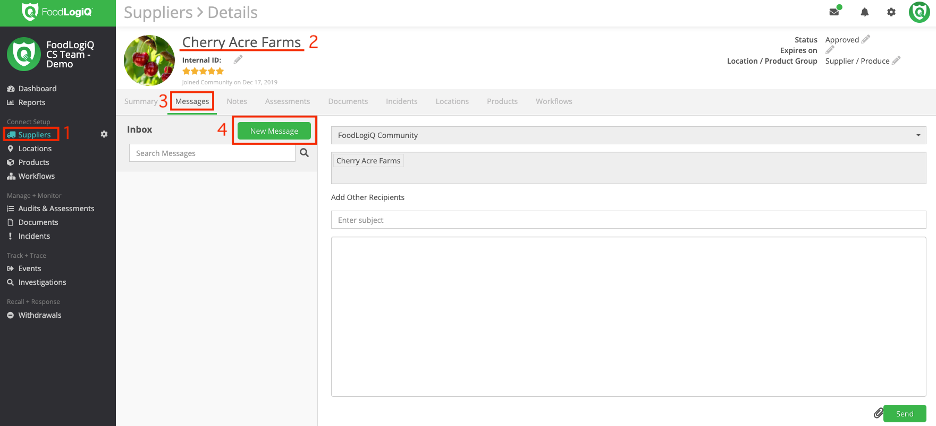
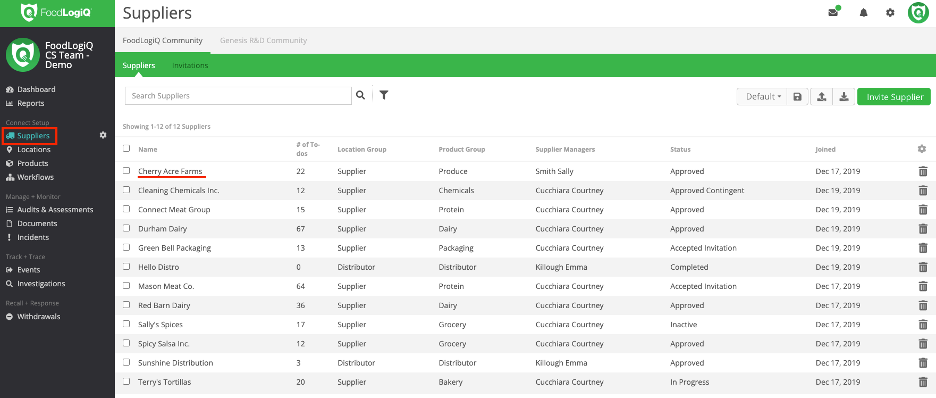
Option 2: Click on Suppliers in the left-hand navigation menu. Click on the supplier’s name within the list view. From the supplier detail page, click the Messages tab to send a message to that specific supplier.
To send a message to multiple suppliers at once, or in bulk, there are two options.
Option 1: Click on the envelope icon in the top right corner. In order for the envelope to be present, the user must be a Community Contact for the community. Then click New Message and select the Community in which the supplier belongs. Then begin typing each supplier’s name in the TO: field. Messages sent to multiple suppliers at once will automatically BCC the recipients of the message.
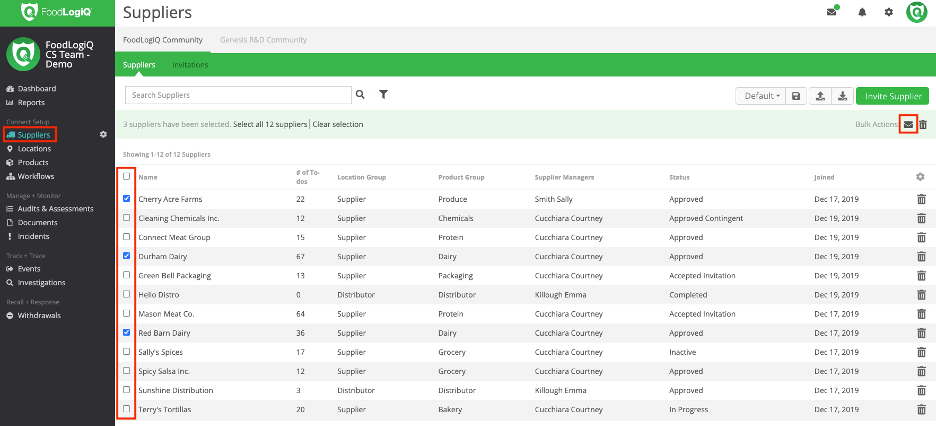
Option 2: Click on Suppliers in the left-hand navigation menu. Click the check box next to each supplier’s name within the list view. In the green, bulk actions bar that appears when a box is checked, click the envelope icon to send a message to multiple suppliers.
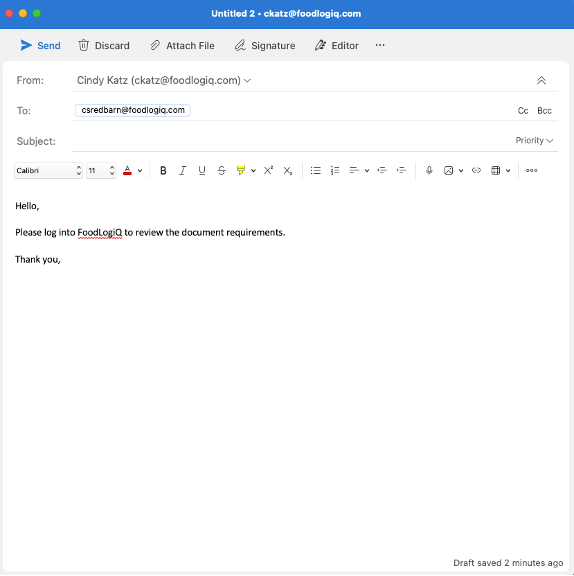
Using FoodLogiQ to Email Suppliers
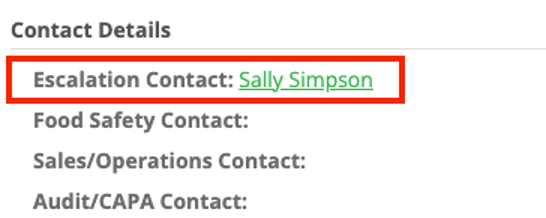
Contacting suppliers in an email can be done by clicking on a location contact’s name within FoodLogiQ.
1. Click on Suppliers in the left-hand navigation menu. Click on the supplier’s name within the list view.
2. In the gray bar on the supplier detail page, click on Locations. Choose the supplier’s location with a location contact. This can be easily seen within the list view by configuring columns.
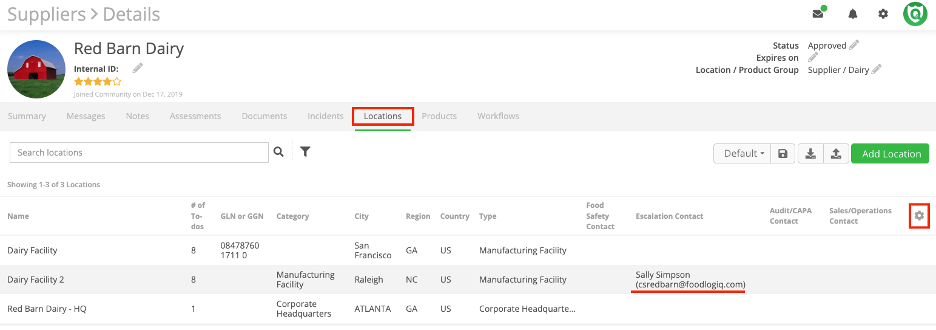
3. Click into the location that has the specified contact. Click the contact’s name (linked in green) to open the computer’s default mail system and send an email.