Today many brands have very specific roles or users who are responsible for managing specific product categories, brands, or types of information and specifically need to be notified when an incident is submitted about specific items they are responsible for.
Incident notifications by attribute allow users to determine exactly who should get notified when a specific attribute (product type, custom selection list option, boolean response) is provided for a specific incident submitted.

Examples of these are:
- If an incident submitter adds an incident for a product type ‘Produce’ then notify the Quality Assurance Manager and the FSQA Manager.
- If an incident submitters respond ‘Yes’ to the Question, ‘Was there a foreign object found within produce delivered?’ then notify the Legal team and the FSQA Manager.
- If an incident submitter selected Brand Type 'Preferred Selection A’ for a custom selection list, then notify the Finance and Marketing team.
Please note: Any role with incident type edit access can configure an incident notification by attribute.
1. Incident notifications are based on an incident type. To learn more see Adding Incident Types Knowledge Base article.
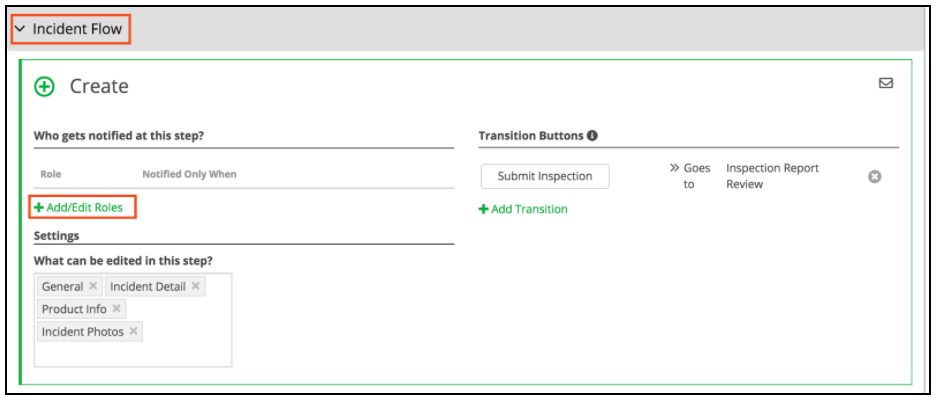
2. Once your incident type template is created, proceed to the Incident Flow section. Within each incident flow internal step, click on the +Add/Edit Roles to configure incident notifications.
-
-
- Please note: Notification configurations only apply to internal steps, for supplier or distribution steps, users will be automatically notified.
- Incident Submitter notifications will continue to be supported based on the configuration of attributes.
-
3. Once you click the +Add/Edit Roles link in green provided in each step, a window will open up allowing you to add roles you have previously configured to be notified for this step. To learn more see the Creating Custom Roles knowledge base article.
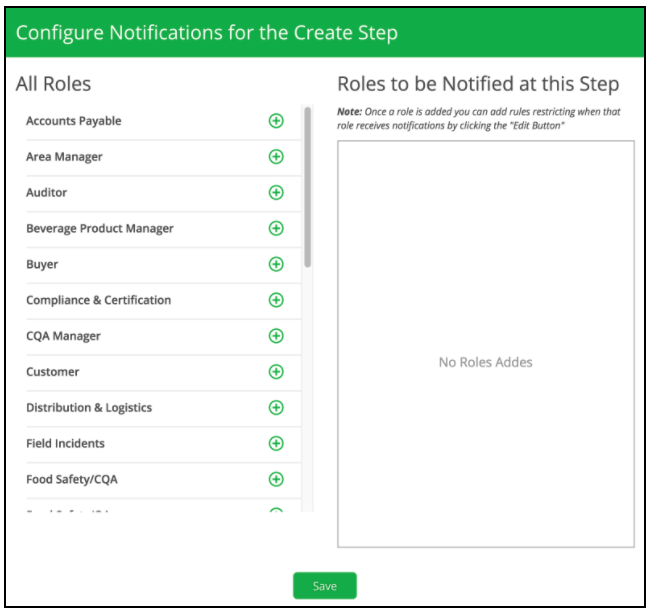
Please note: All roles with access to this incident type will only be listed here, an error message will display if roles don’t have the proper permissions to this incident.
4. To add a role to be notified for this step, click on the green + button next to the role. This will move the role to be notified for this step to the right-hand side, underneath Roles to be Notified at this Step section.
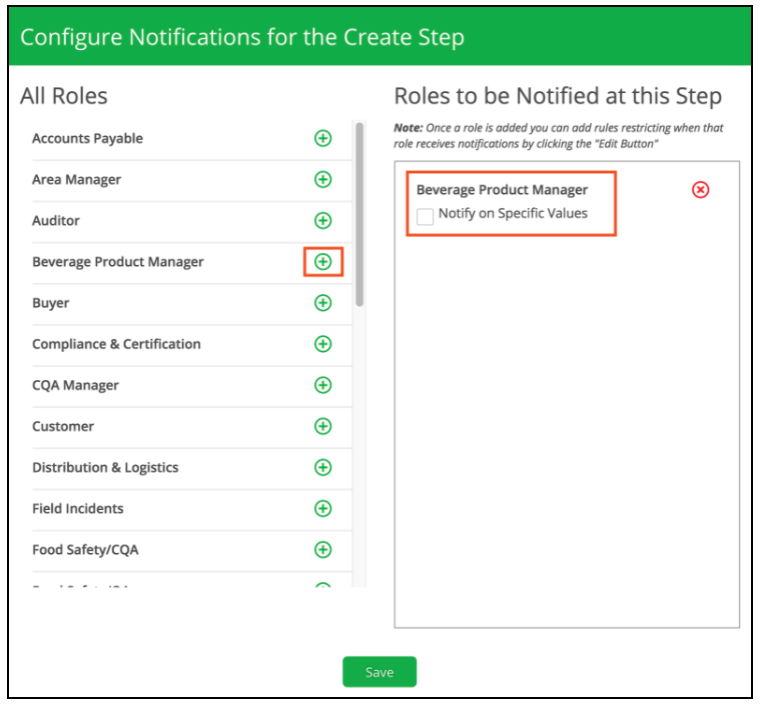
Please note: The same role can be selected to be notified for different attribute values. The notification list will be deduplicated in the case the same role matches more than one scenario.
5. To notify based on specific values (product type, custom selection list, or boolean response) for an incident submission, click on the open check box, here you will be presented with a form with 3 required drop-down fields to fill out.
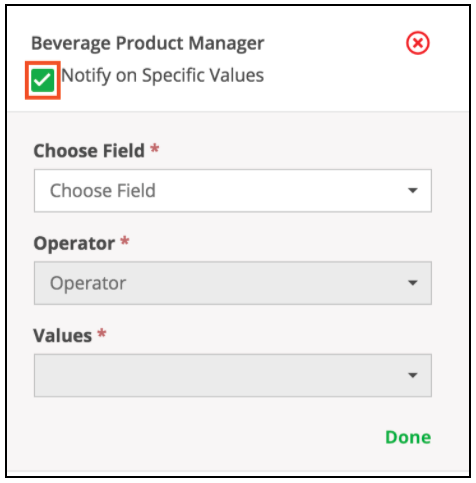
6. Users will be required to fill out Choose Field, Operator, and Values to determine who gets notified based on values.
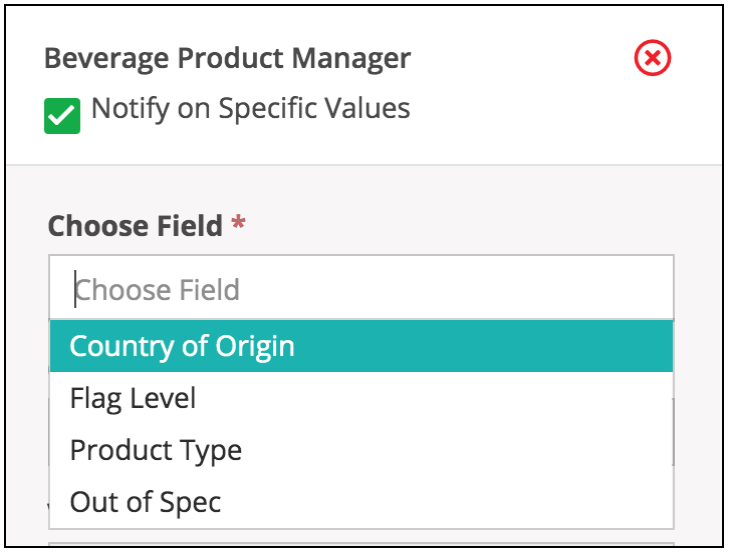
- Choose Field - Users will be able to select from Product Type, Custom Selection Lists, and Boolean attributes types configured with the incident template creation.
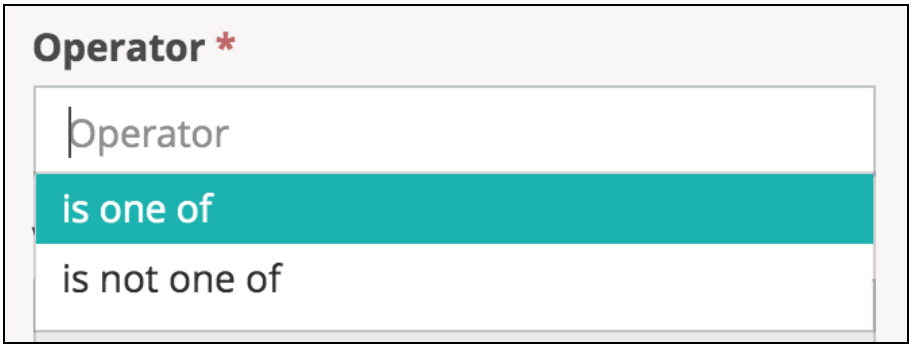
- Operator - User will be able to select from is one of or is not one of unless the Choose Field is a boolean type attribute, where you operator option will only be is.
-
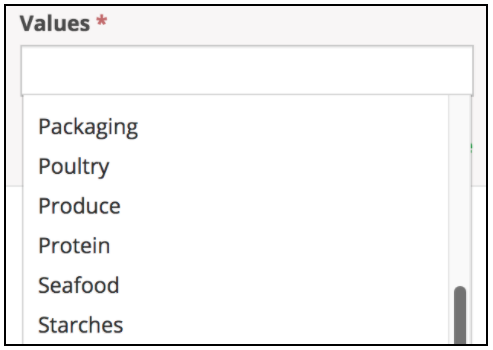
Value-Based on what the user selected within the Choose Field option will determine the values presented here.
-
- If the user selected a Product type attribute, the user will be able to select from all the product types created. To learn more see the Product Types knowledge base article.
- If the user selected a boolean type attribute, the user will be able to select from True or False.
- If the user selected a custom selection list type attribute, you will see all the selection list options they configured here.
-
7. Once you are done filling out the fields click on done and then save to persist the edits.
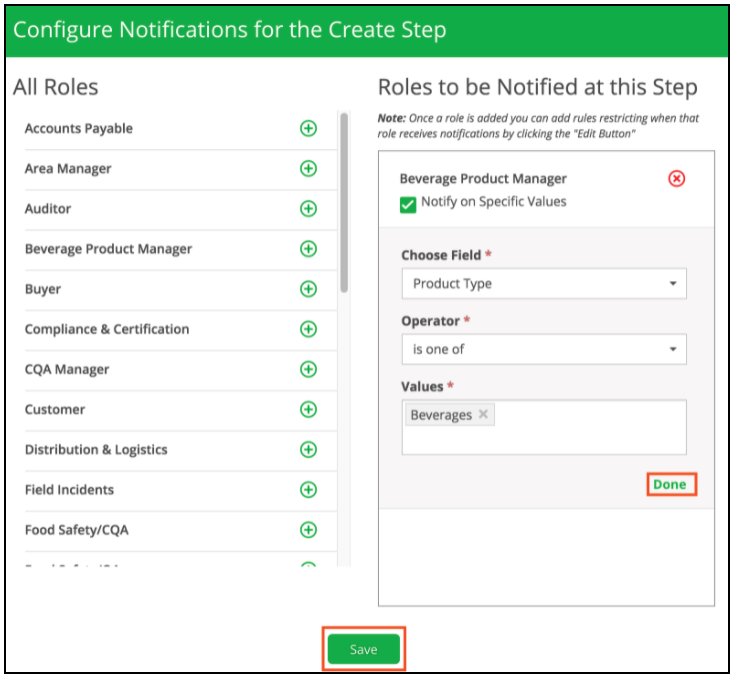
8. Upon save, the window will close and you will see the roles to be notified based on this step or a specific value.
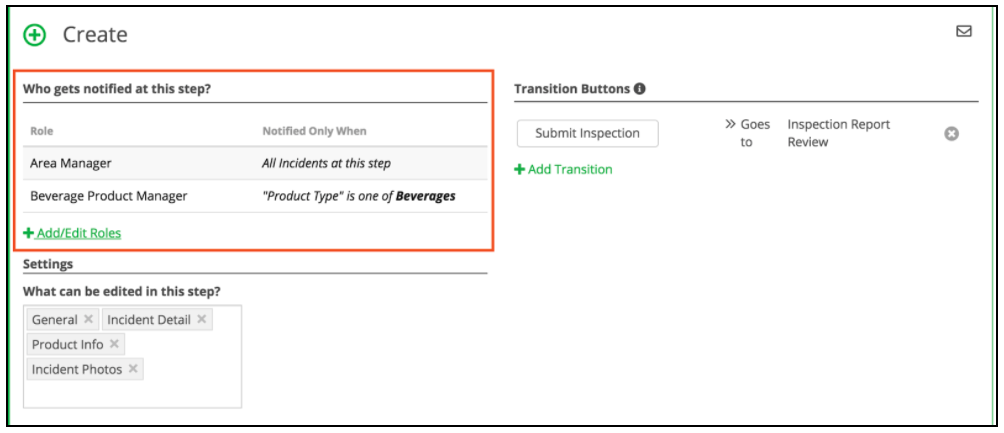
9. To add or edit additional roles, simply click on the +Add/Edit Roles link again.