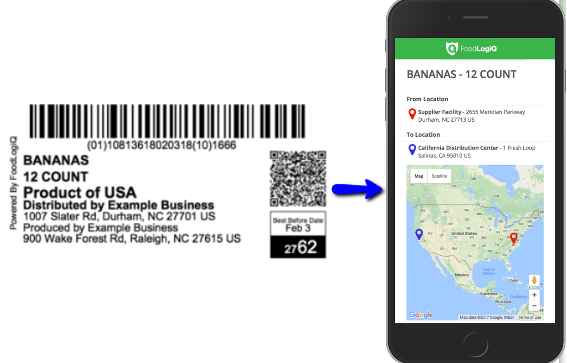
As a community owner with a Track + Trace subscription, you have the ability to enable the generation of event labels for an event. The label contains a scannable QR code that links to a page with information about the product and its origin. Generate these labels from the Events page. If you have yet to setup your event types, please visit this article first.
You also have the ability to generate GS1 Compliant labels. To learn more about how to do this, see this article: Create GS1 Compliant Labels.

Steps to Enable
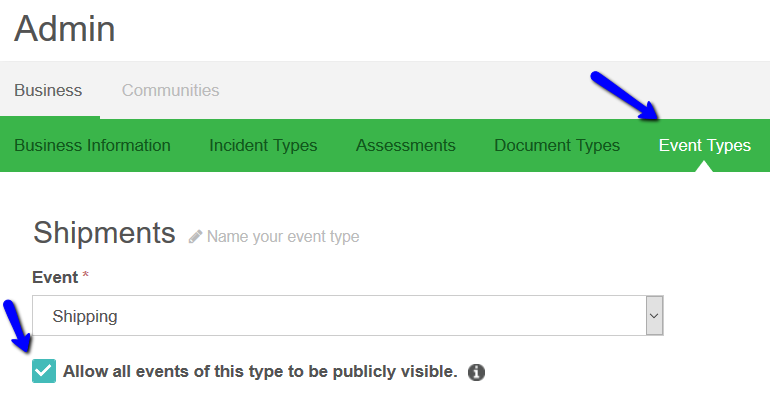
- Go to the Event Types page.
- Select Event that you want to enable labels for.
- Click the checkbox next to "Allow all events of this type to be publicly visible."
- Click Save.
You will need to submit events before you can generate a label. Visit our Data Submissions Overview article to learn about the different submission methods you can choose from.
Steps to Generate QR Code Event Label
- Go to the Events page.
- Go to the Shipping, Receiving, or Transforming tab depending on the type of label you are wishing to generate a label for.
- Events that you can generate labels for will have a barcode icon
 displayed. Click this icon to begin creating your QR Event Label.
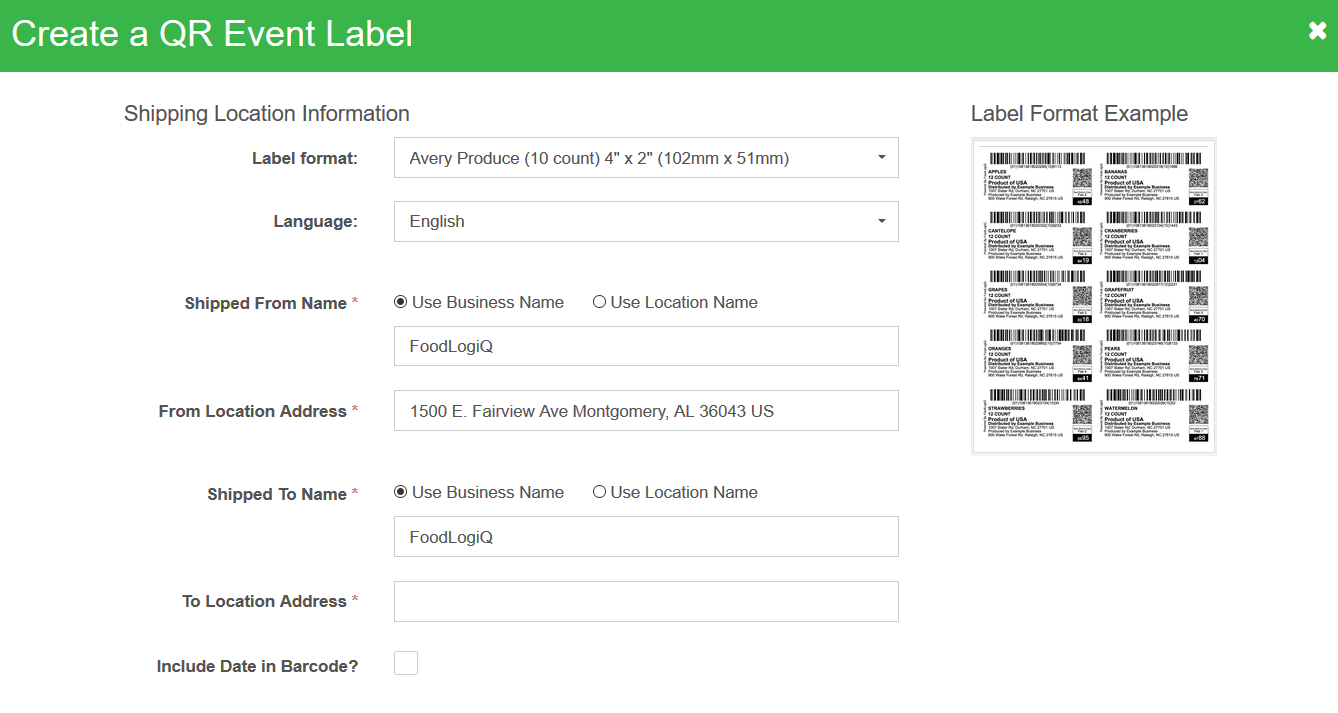
 - Select the label format, then enter the shipping location information. You have the option to select a language, and whether to display the business name or location name.
- Next, review the product information displayed and optionally modify if needed.
- When ready, click the Generate Label icon to download a PDF of the label to print. .
Details on how to generate QR Code Event Labels
First, you will need to go to the Admin page, click on the Events tab, and enable the setting to allow for QR code event labels to be generated for a specific event type.

You will need to submit events before you can generate a label. Visit our Data Submissions Overview article to learn about the different submission methods you can choose from.
Once you have events submitted in your account you are ready to generate labels. Visit the Shipping, Receiving or Transforming tab within the Events page based on the type of event you have setup to generate labels for. You will see a barcode icon next to the applicable event records. Click the barcode icon to generate your label.

Next, you can select your desired label format and update any information as needed to customize your event label. Once complete, click generate label button. This will generate a PDF that you can then download and print.

Using a QR code scanner application, you will be able to scan the barcode which will then load a page within your mobile browser to access a publicly accessible webpage based on the Event ID.
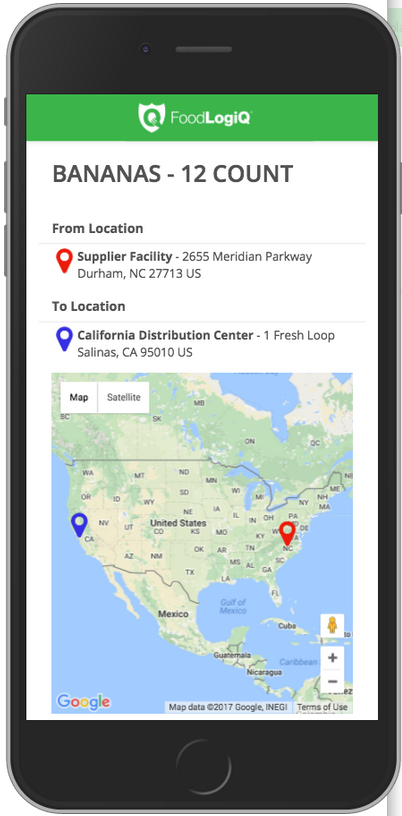
The event page will display the following information:
- From Location
- To Location
- Map showing From/To Location (if geocoordinates are available)
- Product Name(s)
- Category Description(s) (from Product Master GPC Brick, if selected)
- Product Description(s) (from Product data, if entered)
If you have collected event records within your business in Connect
See a sample public event page shown below.

Want to learn more about Events and Investigations in Track + Trace? Check out these quick videos or submit a request below.
- Events Intro in FoodLogiQ Connect using Track + Trace
- Event Template in FoodLogiQ Connect using Track + Trace
- Investigations in FoodLogiQ Connect using Track + Trace
- Investigation and Recall in FoodLogiQ Connect using Track + Trace