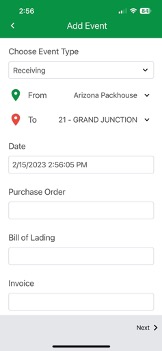
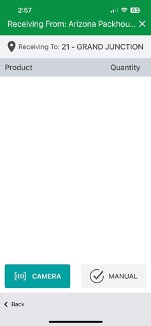
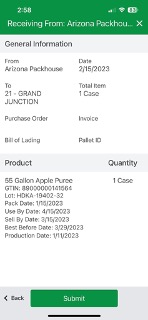
Event reporting can be done using the FoodLogiQ Connect mobile app. Some benefits of reporting events via mobile device include the ability to scan barcodes to easily identify the product and supplier in the report as well as make it simpler to take photos and include them in your submission.
The application can be downloaded from Google Play or the iOS App Store. To learn more about supported operating systems and devices, visit the FoodLogiQ Connect Mobile article. Please note, as an administrator you will need to enable mobile access for your event types before your users will be able to utilize the mobile app.
Steps to Create an Event on FoodLogiQ Connect Mobile App
- Download the FoodLogiQ Connect app from Google Play or Apple iTunes Store. Consider setting your device to auto update your apps.
- Login to the FoodLogiQ Connect app.
- Set your default location by selecting the Settings option from the footer and choosing the Default Location drop down. If you only have access to 1 location, this should be set by default for you.
- Set your default community by selecting the Settings option from the footer and choosing the Default Community drop down. If you only have access to 1 community, this should be set by default for you.
- Open the device Settings and select the FoodLogiQ app. Enable to allow the use of the Camera. If operating a device with a laser scanner, enable the built in laser scanner within Scanner Settings.
- Select "Events" from the app footer.
- Click the "+" button to report a new event.
- Select the type of Event you are reporting.
- Complete the required information and click Submit when complete.
Details on Using FoodLogiQ Connect Mobile App to Create an Event
Download the FoodLogiQ Connect app from your device's app store. Once downloaded, open the app and login with your email and password.

Once logged in you can select the settings icon from the footer and will see a screen like the one displayed below. If you have access to only 1 location and/or 1 community you will see that listed by default. If your user profile has access to multiple locations or communities you will see a list of locations and/or communities to select from. Once you have confirmed your default location, you can click outside of the window to close.
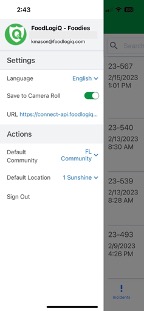
(Note: When you set a location and/or community as your default, every time you login to the app on the same device, you will bypass this screen. Your location will be preset for you.)
From the Settings menu, you can perform a number of actions:
- Set an app language.
- Supported languages include: English, Spanish and Portuguese
- Select to save images taken in the app to the device camera roll.
- Choose to point the app to the production or sandbox environment via the URL section.
- Set a new default community depending on your level of access.
- Set a new default location depending on your level of access.
- Sign out.
To reach the Events section select outside of the window and choose “Events” from the footer. Once you have selected the (+) from the upper right hand corner, you can choose to enter a receiving event, a shipping event, or a transformational event.
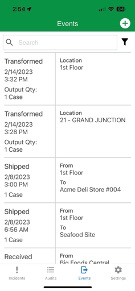
If there are events already reported for your location you will see a list of those items on the screen. To report a new event, click the "+" button.
You will be presented with a set of fields to fill out to complete your report. Click the Next button to advance through the screens until you have completed all required information. Upon completion you will see a summary of all the details you have entered. Click Submit once you are done.
